Your cart is currently empty!
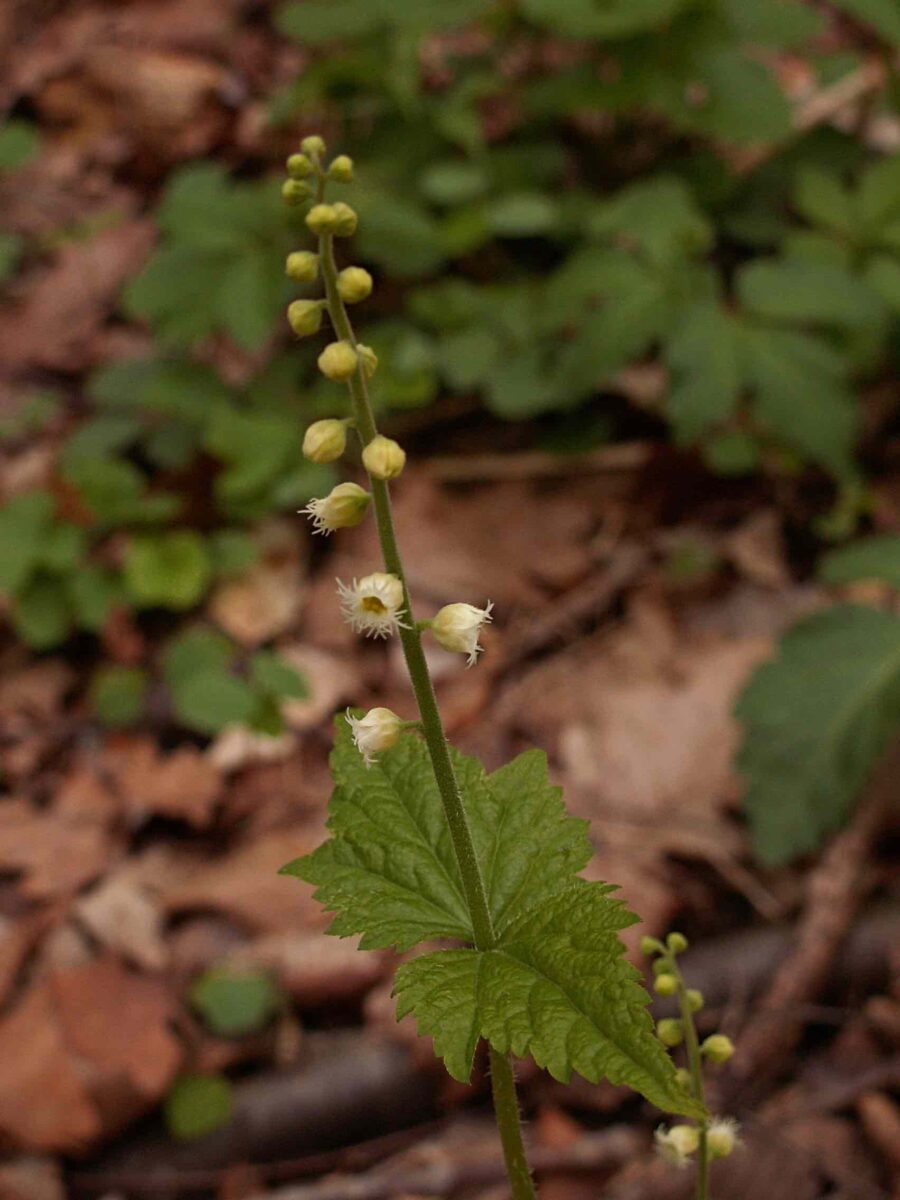
A Quick Growing Guide for Miterwort
The Miterwort, Mitella diphylla, is the jewel of the spring shade garden. Consult our Quick Growing guide for this special shade plant.
Your cart is currently empty!
Photo:
Photo by Roman Biernacki via Pexels
Author: Rebecca Last, Gardening at Last, Master Gardeners of Ottawa-Carleton; published with permission
I really enjoy finding culinary uses for my plants. So, I was thrilled to learn that those lovely pinky-purple chive flowers make bottles of deliciously flavoured vinegar. It’s so easy that even a non-cook like me can make it.
Garden chives (Allium schoenoprasum) typically flower in late spring or early summer. Pick the flowers before they are fully open. Do this in mid-to-late morning, after the dew has dried but before the full heat of the day. Rinse the flowers in cool water and pat them dry with a paper towel or clean cloth. Fill a large,
clean (preferably sterile) glass jar with the flowers. Cover with plain white vinegar. Seal the jar and let it sit in a dark place for 6 to 8 weeks.
When the chive flowers have lost their colour and the vinegar has turned a lovely fuchsia pink, it’s ready to decant. I’ve reused glass syrup bottles, or you can buy flip-top glass bottles from the dollar store. Whatever you’re using, sterilize the bottles by boiling for about ten minutes.
Sieve the flowers out of the vinegar and pour it into the sterilized bottles. I find the onion flavour and aroma very strong, so I mix two-thirds chive flower vinegar with one-third white vinegar. Label the vinegar bottles, and you’re done.
Another super-easy vinegar is made with fresh raspberries. There are many recipes online for sweetened raspberry vinegar, but they all require cooking – not my strength. Plus, once you heat fresh food, it loses some of its vitamin C. So, I decided to try a cold infusion, and it works well. The key is to use ripe raspberries, avoiding any that are overripe and especially anything that might be mouldy.
As with the chive vinegar, fill a large, clean, sterile glass jar with raspberries. I leave them whole so there is room to add white wine vinegar, which is less acidic. Leave the jar in a cool, dark place for at least two months until much of the colour transfers from the raspberries to the vinegar.
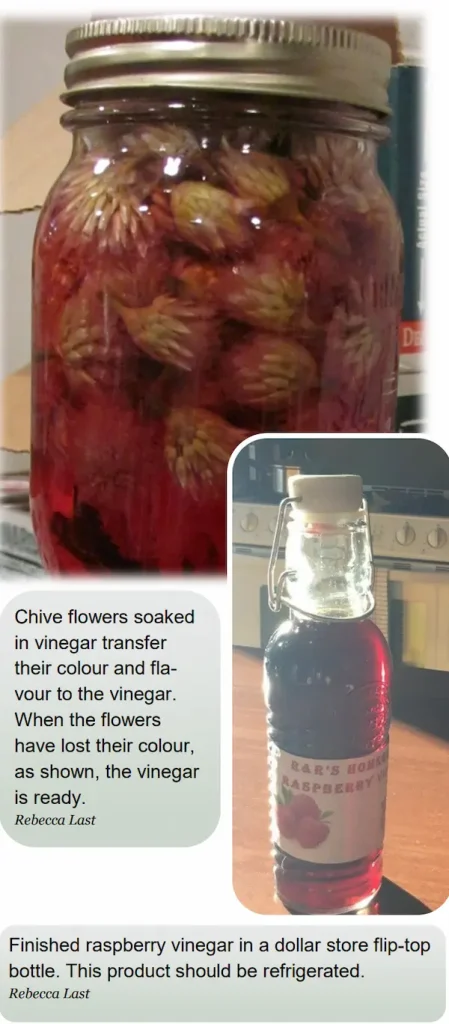
When it’s ready to decant, I use a jelly bag and squeeze out the maximum amount of juice. If you don’t have a jelly bag, use multiple layers (at least four) of cheesecloth inside a colander and crush the raspberries against the cheesecloth. When you’re finished, the remaining raspberry pulp should be nearly dry.
The vinegar is now dark red and contains about 60% pure raspberry juice. When decanting into sterile bottles, I fill two-thirds with the raspberry vinegar and top up the last third with white wine vinegar.
These two easy recipes result in a lovely product that you can use yourself or give to friends. Both types of vinegar should be refrigerated.
Master Gardener Judith Cox shares her recipe for nasturtium vinegar.
The Miterwort, Mitella diphylla, is the jewel of the spring shade garden. Consult our Quick Growing guide for this special shade plant.
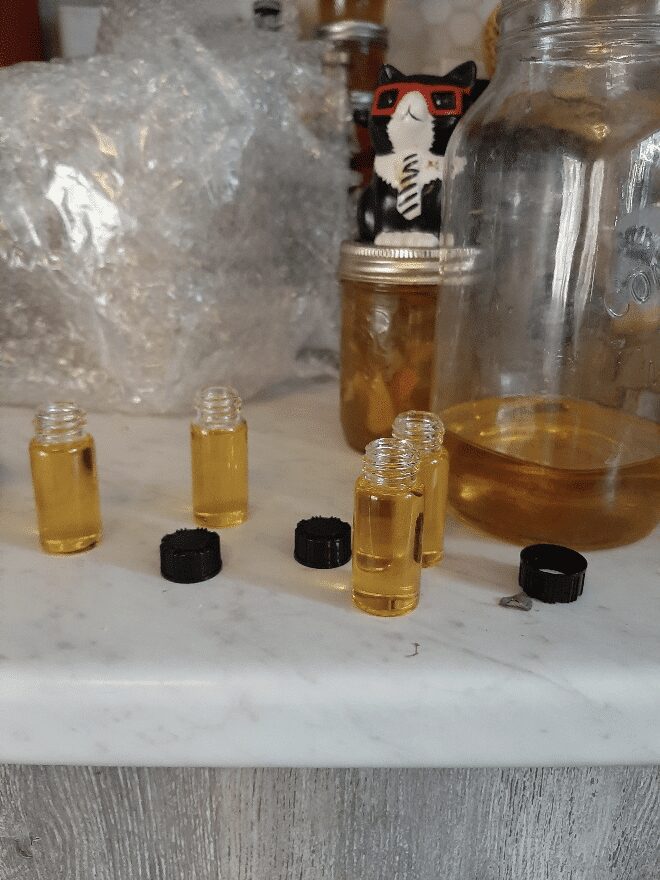
I am very excited at how well my calendula oil turned out. I used grapeseed oil as my carrier oil this time.
A townhouse garden can be a place to getaway, enjoy nature, go tropical or just getting outside.
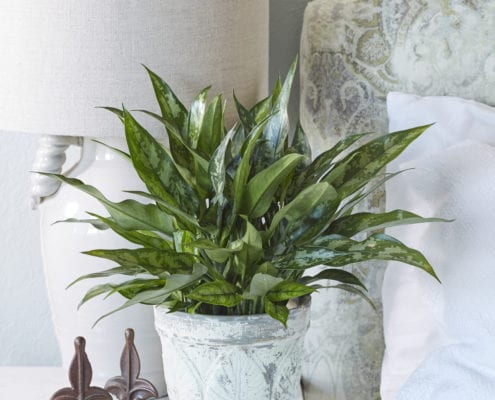
Houseplants are the perfect solution to help purify the air and add serenity to your space. Plus, they can add natural color and exotic beauty to bedrooms.
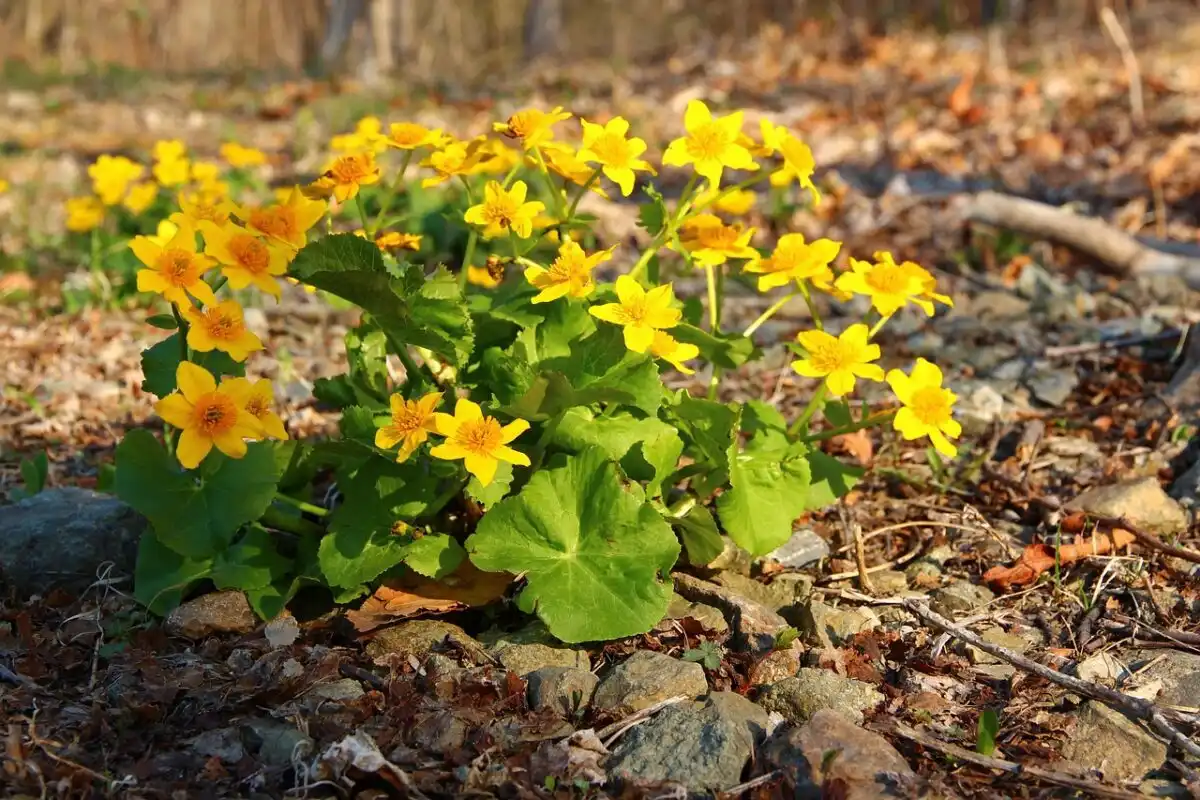
Marsh marigolds resemble massive buttercups. It is a popular spring plant because of its vivid yellow blooms that bloom in moist soil.
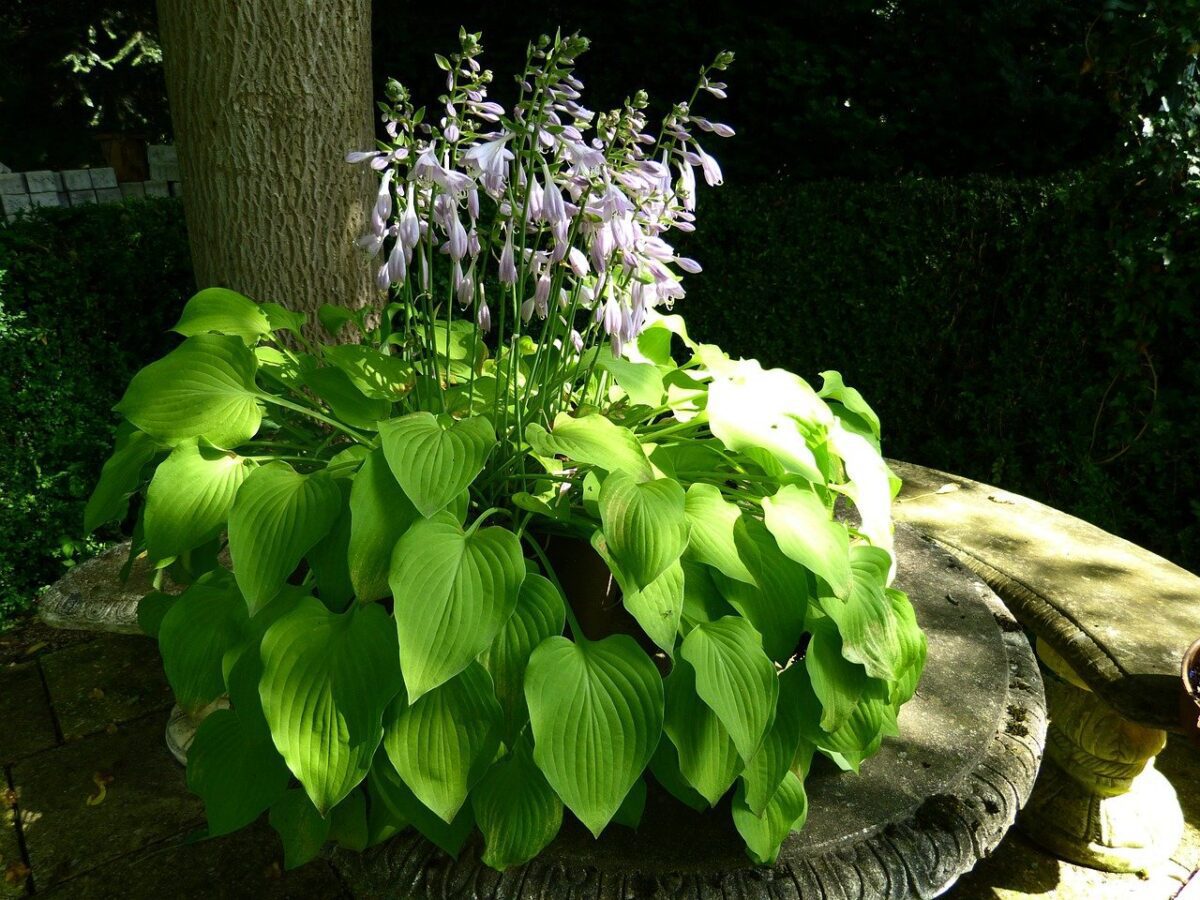
Hostas are lush, leafy perennials that thrive in shade to part sun. Sought after for their leaves and their ability to thrive in shade.
GardeningCalendar.ca gets some funding from advertisers. If you click on links and advertisements at no cost to you, the site may receive a small commission that helps fund its operation.
© 2025 J&S Calendars Ltd.
Leave a Reply
You must be logged in to post a comment.