How To Plant And Care For Canna Lilies
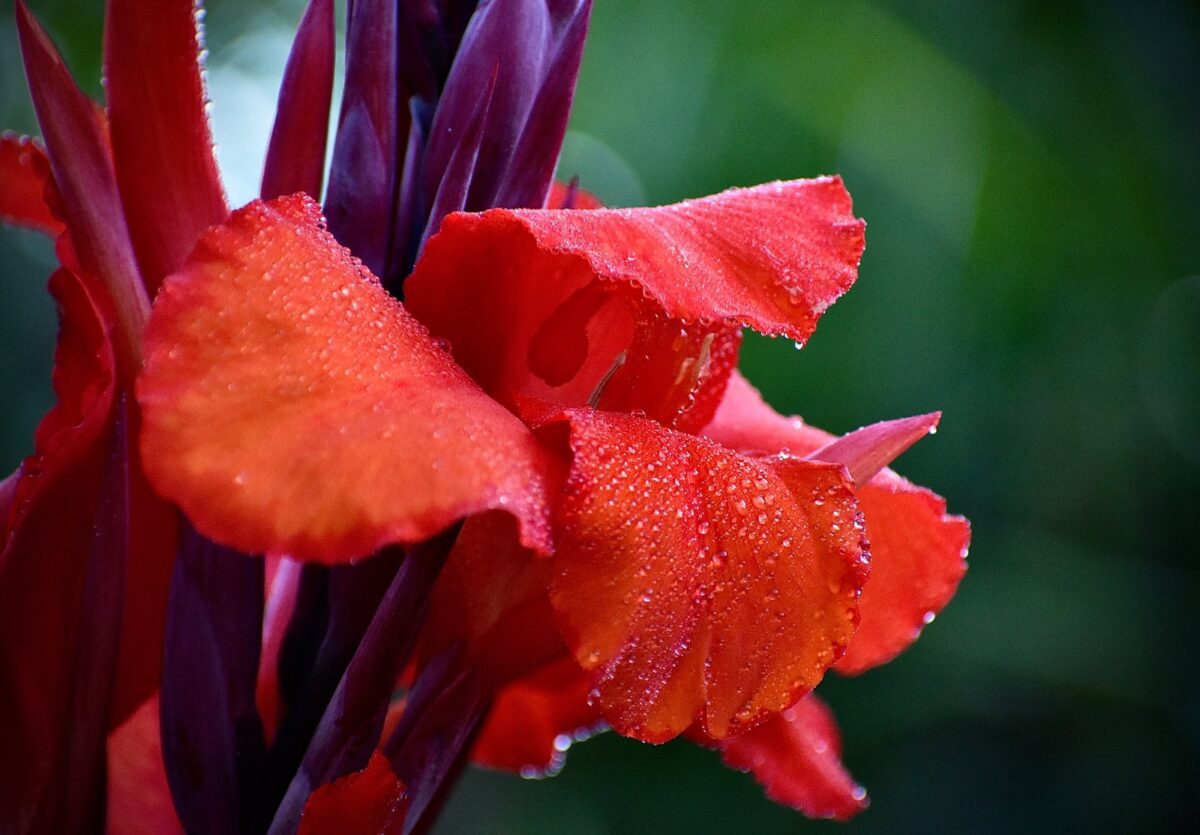
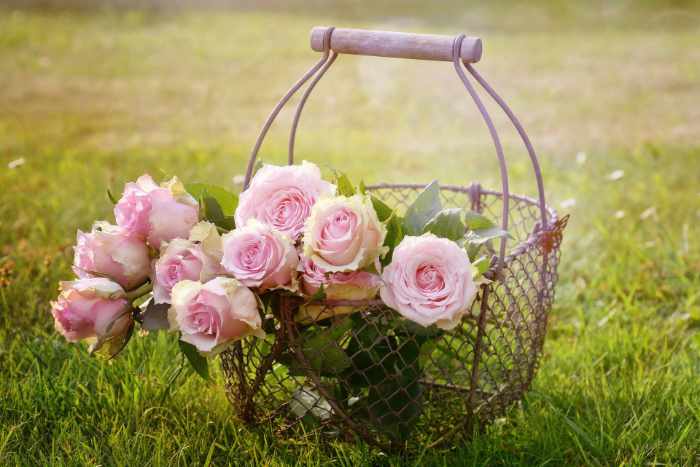
The Canna Lily was my mother-in-law’s favourite plant. Hers were planted in the dominant position in her flower gardens, taking advantage of its height behind smaller flowers and plants. She even planted one in her vegetable garden as a companion plant. She loved Canna Lilies’ deep purple, burgundy, maroon and red flamboyant flowers and summer colours. Good news, Canna Lily is an easy to care plant, it is low maintenance.
Canna flaccida – A small yellow flowered wild canna species native to South Carolina and Florida. It was a principal parent of today’s modern Cannas, through hybridizers can see little resemblance now.
The Canna Indica is used as a source of food as the bulbs or rhizomes contain starch, called achira. In Vietnam they use the starch to make high quality “cellophane” noodles. In Thailand the canna lily is a traditional gift on Father’s Day.
Apart from being ornamental plants in the garden, but they have “other” uses as well. Canna lily seeds are hard and sturdy, brown/ black, when dry and pea-sized. The hard bullet-like seeds of Canna indica earned it the name “Indian Shot.”
Quick Growing Guide

Botanical Name: Canna
Sun / Shade:
Water: Water well and consistently
Height:
The Canna Plant
Introduced to Europe in the early 1500’s, canna species became popular tropical plants in the mid to late 1800’s. Canna Lily bulbs are perennial in nature. Individual stems have a thick rootstock or central stock which has on an average 10-12 leaves spirally growing around it. The plant leaf is generally emerald green but hybrids of dark bronze and maroon foliage colors, along with striping exist.
Canna Lily: Perennial or Annual?
Cannas Lilies are perennials in zones 8 to 11. However, there are reports that they are being overwintered now in Zone 7 (0°F). Typically, they can withstand periods of air temperatures below 0° C, but they don’t do well with frost in the ground. In colder climates, they can be overwintered indoors.
Cannas Lilies are perennials in their native parts of North and South America. They range from Argentina to South Carolina and parts of the Caribbean islands.
As perennials, canna lilies are plant them and forget them. These plants can take plenty of heat and thrive in full sun. They require little care and continue to colour your garden for years.
In cooler regions, they are grown as annuals. In most part of Canada, they are an annual. Canna Lilies can be tried as a perennial in parts of the pacific coast of British Columbia, including near Vancouver and parts of Victoria and Vancouver Island.
To bring them indoors, after the first frost in fall, cut the stems to the ground and lift the clump of rhizomes with a spade or fork. And yes, referring to my mother-in-laws favourite plants, she did dig them up every fall to bring the stems indoors.
If you don’t live zone where Canna Lilies are perennials, consider growing them in containers and pots. You’ll save the dirt under your finger nails that you get from digging them up! (Opps, I forgot, no worries, you wear gloves!)
How To Grow The Canna Lily Flower
- Location – when you plant canna lily bulbs, find a location with a well-drained soil and gets plenty of sun. Soggy soil is not generally favorable for these plants. If the soil does not drain after 5-6 hours, choose another site, or layer a compost in the soil with improve draining properties.
- Lighting – For greatest number of blooms and dark green bright leaves, plant them in a location where they get lots of sun.
- Spacing – There are tall and dwarf canna varieties. When planting canna lily bulbs, plant taller varieties 2 feet apart. Plant dwarf varieties 1 foot apart and 4 inches deep in the soil for enough space to grow. Sow the rhizomes with their eyes, or growing points facing up.
- Post planting – water plants well and enjoy heat for getting a good start. Roots sprout after a few weeks. If the temperatures are cooler in your area, they will take longer.
- Water – When you water canna lily, the soil should remain damp but does not become soggy.
- Pruning – In general, cannas do not require pruning. However, if you want to keep things clean, prune away.
- Containers and Pots – When growing plants in pots or containers, fill them with a high quality well-drained soil. Any container or potting method works fine if drain holes are present. Planting is just the same as discussed for open air planting. Container plants may need to be water twice per day during hot summers. Don’t allow plants to become root bound.
Tip: When growing from seed, soak Canna seed in warm water, or notched with a file, to speed up germination.
Tip: Grow Canna rhizomes planted in the spring after the weather warms. They are especially useful when planted one clump to an 18-inch redwood tub.
Container Gardens – Canna can be mixed with any other of plants to make a striking container garden. This works well as long as all the plants have the same temperature and water requirements.
How To Care For Canna Lilies
Canna Lily Care – Canna’s require minimum care and are quite easy to maintain for years. Canna lily plants like moisture. Water them well but make sure to plant the roots in a well-drained soil. Soggy soil can rot roots quickly. Apply mulch to retain moisture in dry areas. The are heavy feeding and love compost and organic material like manure. Slow-release fertilizer with high phosphate contents on a monthly basis to help keep continuous bloom. A liquid fertilizer during summer also works for keeping plants healthy.
Deadheading the plants not necessary for continuous blooming. However, pruning keeps things tidy in the garden which helps with overall garden pest control. Dig rhizomes in Zone 7b and north cold climates during the fall. Storing canna lily bulbs and rhizomes should be a part of fall care. Only remove leaves once they turn yellow. Plants rest in fall and winter and get ready for the spring season.
Canna Pest and Diseases
Japanese beetles and caterpillars will feed on the foliage. Read our article on controlling caterpillars for details on dealing with them.
Bacterial infections start early when leaves are rolled up. This can lead to infected foliage and flowers rot. To avoid bacterial infections, select healthy plants spray dormant rhizomes with a Streptomycin solution.
In mild winter areas, plants can be left outside with a shelter. However, it is better to apply mulch for no losses in winter.
Store cannas from year to year after the last frost… they are prolific enough to have lots to give away.
Over at A Way To Garden (awaytogarden.com), Margaret Roach has put together a nice slideshow and info on getting those cannas ready to fill the landscape. Check out the slideshow via A Way to Garden
For severe winter conditions, simply move specimens to a warmer environment. Remove the extra foliage, stems, make the soil dry and remove surplus soil and store the plants in a frost free place. The plants can be planted in a warmer condition and watered as required. This is called winterization and is the best winter care for canna lilies.
In winter, do not keep plants dry or saturated with water. Both conditions cause them to wither in autumn. Just enough water, fertilizer, sunlight are best to keep plants healthy.
Growing Dwarf Cannas A Personal Journey
The hybrids – they’ve improved, but you’ll find some nice little growing tips from a time when people took special care of there gardens. This was long before cable, iPads, and the internet! Enjoy.
Years ago, many houses were large with spacious lawns. Tall cannas were a popular item and widely used in garden landscaping. As houses and lawns diminished in size, giant canna plants, with their large foliage and massive flower clusters, gradually disappeared from the scene.
Hybridizers have brought cannas back to our gardens by developing smaller, dwarf cannas that fit into the landscape of the modern home. New canna flower colors are brighter and more beautiful than those of the old taller varieties. And there are many pastel tints that blend well with any background. The dark green or bronze foliage, with each plant producing several unbranched, stately stalks shooting up from a single rootstock. These lovely new dwarf hybrids grow from 2 1/2 to 3 feet tall. Compact in size they freely produce large, gladiolus-like florets on medium-sized spikes.
Uses For Dwarf Cannas
Plant several red canna lily beside a white garden gate to add a splash of color all summer.
On either side of the borders, plant them to frame the plantings as well as within the borders themselves, to provide accents. Plant a few along a white garden fence as a background for low-growing annuals such as petunias, and set others out in front of evergreen plantings to add color. I’ve also seen four cannas of the same cultivars planted in the center of a circular bed, surrounded with low-growing annuals of a lighter shade. This combination creates a striking effect on a smooth, velvety green lawn.
The popularity of dwarf cannas, fuels the development of new and interesting varieties. Most find all of the dwarf cannas easy to grow. If you have a greenhouse or a large sunny window, buy divisions around the first of March and start them in 4 to 6-inch fiber pots for early bloom. Fill each pot two-thirds full of sandy soil. Lay the division down flat with the eyes pointing upward, then cover it with 1 inch of soil. Keep the soil moderately moist at all times. Fill each pot two-thirds full of sandy soil. Lay the bulbs down flat with the eyes pointing upward, then cover it with 1 inch of soil. Keep the soil moderately moist at all times.
Planting option
If you prefer, or if space is limited, plant all of your divisions in one large flat, placing 3 inches of sandy soil below them, and 1 inch above. Make certain the divisions do not touch, or rot may set in. Cannas are tropical and subtropical plants and must have a constant warmth to produce growth. Keep temperatures around 70° night and day until sprouts develop. When the sprouts are 3 inches high, transplant the plants into a larger container or into a sheltered coldframe outdoors until all danger of frost is past. If you want to increase your supply of plants take up the divisions and cut each into as many sections as there are shoots. Leave as much of the fleshy division with each shoot as possible and take care not to harm the small roots already formed.
Replant divisions individually into fiber pots, and placed on a sunny window sill until all danger of frost passes. Or transplant into a coldframe until outdoor planting time. If you do not want to divide the plants, leave them in the flat in a south window until they can be moved outdoors.
Leave as much of the fleshy division with each shoot as possible and take care not to harm the small roots already formed.
Starting canna early indoors does provide an advantage, but is not required. Plant unsprouted divisions in their permanent location outdoors as soon as the weather warms up. These will bloom by midsummer or earlier, depending upon variety.
Preparing Outdoor Beds
Prepare the outdoor beds well in advance of planting time. This allows the organic matter, lime, or commercial fertilizers time to broke down from the soil bacteria, and converted into food for the plants. Since dwarf cannas are heavy feeders with massive root systems, deep cultivation and plenty of organic matter are the secrets of success. Spade beds to a depth of 18 inches, then turn in a reasonable amount of aged cow manure, peatmoss, compost, or leafmold, depending upon the needs of our soil. Rake the beds smooth and water them down well to settle the soil for planting.
If you do not have any organic matter on hand, you can use dehydrated cow manure with a 5-10-10 commercial fertilizer. Use this mixture only in the holes where the divisions, or plants, are placed. After all plants sprout, top-dress the entire bed with this same mixture to help produce robust plants with plenty of bloom.
If you have established shoots growing in the house or in the cold-frame, harden them off by gradually placing them in the open by day and bringing them in again on cool nights.
A Canna Lily Grower Tip
In most areas, the first week in June is a good time for transplanting canna shoots into their permanent locations.
- Place two handfuls of fertilizer in each hole and mix it well with the soil. If using fiber pots, place pot and all into the hole. When transplanting the divisions from the coldframe, take a ball of earth with each one and water well after planting.
- Set unsprouted divisions 2 inches deep, 12 to 24 inches apart, depending upon the effect you wish to achieve.
- Cannas are fast growers and need a great deal of water. Dry soil will retard growth, and deform the flower spikes. Water well at least twice a week during hot, dry weather. To help conserve moisture and to keep the soil in good tilth, mulch cannas with at least 6 inches of green grass clippings after the shoots have reached a foot in height.
- To help conserve moisture and to keep the soil in good tilth, mulch cannas with at least 6 inches of green grass clippings after the shoots have reached a foot in height.
Fertilizing
During the last week in July, just as the plants are setting their buds, mix up a liquid plant fertilizer made by stirring one-half cup of dehydrated cow manure into a gallon of warm water, using a quart per plant. If you prefer, you can give another top-dressing with a 5-10-10 commercial fertilizer instead of the liquid fertilizer. When using a dry fertilizer, water it in immediately with a fine hose spray.
Watch out for Japanese beetles bothering your cannas. Pick them off by hand. If any other insects should infest your plants, use an insecticide according to manufacturer’s directions. It is important to spray regularly as recommended until they all disappear.
Another pest to watch out for is the canna leaf roller. The first measure to control the larvae that feeds inside the rolled leaves is to consider Bacillus thuringiensis. Learn more about BT here and more about the canna leaf roller here.
When frost finally blackens the canna foliage, cut off the stalks, take up the rootstocks and, after drying them off, store in a dry, cool place until spring.
Canna Questions and Answers:
How Long Does A Canna Root Have To Rest?
Question: How long does a canna root have to rest? I would like to start them in pots in the house before setting them out later.
Answer: Start canna roots in March indoors and by May 1 you will have nice heavy plants ready to set outdoors. There is no advantage in starting cantles earlier than the middle of March for the plants would become too. large to handle in pots.
To start the new plants, cut each eye from the clumps. Each fat tip, a couple of inches long, will soon root and produce a new plant.
Cannas Have Lovely Foliage But Few Flowers
Question: I have some very old canna bulbs. Why do my cannas have lovely foliage but only is spike of a flower? Kansas
Answer: Old fashioned cannas were grown chiefly for their foliage. The newer hybrids are noted for their gorgeous flowers. It would be well to discard the cannas you are growing and buy some new hybrids in colors of your choice. No amount of pampering will make old strains of cannas bloom like the new hybrids.
Can You Start Cannas Indoors?
Question: Is it necessary to start cannas indoors?
Answer: If your growing season is short and cannas bloom just before killing frosts when planted directly outdoors, it is advisable to start the tubers in March in flats or large pots in a warm cellar or attic.
The Boldness of Cannas In The Landscape
Where a bit of striking color is desirable, cannas are the answer. Their foliage and blossoms are spectacularly bright. The thick leaves, which may be dark green or bronze, give a tropical feeling. Flowers are large and showy, most often in vibrant yellow and scarlet colors bring a boldness to the landscape and that never goes out of style.
Sources
North Carolina State University